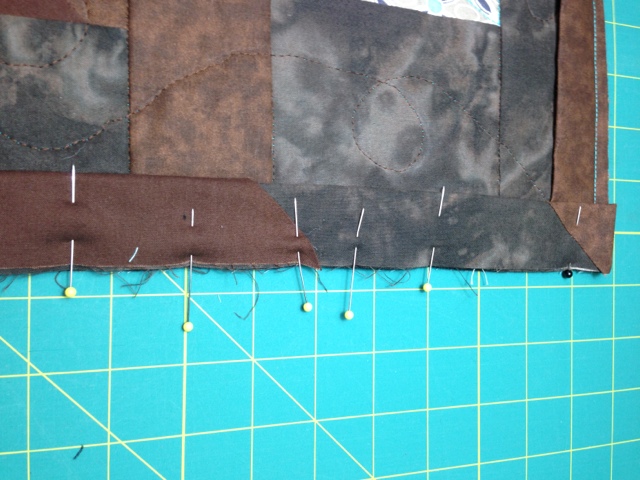
A while ago I had a friend ask me to show her how I do my quilt bindings. I was working on one and took the pictures as I started the process. I then turned that last corner and finished the binding. No pictures. So this morning I decided that I would try again. I was working away when I realized I was sewing that last corner, again!! So I stopped and took some pics. When I start, I leave a 8-9" tail. That gives me lots of room in the end.
I then press that edge over just one and press. Notice I cut it on a 45 degree angle.
I stop a good distance before I meet where I began. In this case I lucked out and was close to a corner ( I did plan that). So I pinned the corner so it is secure.
I then open the tail of where I started. I lay that bottom piece as flat as I can make it, and stick a pin in to make sure it does not move.
Then I carefully work the end piece into that pocket. I also cut the end tail at a 45 degree angle. Make sure the folds are in each other.
Pin it into the quilt.
Work the top binding back in place. Pin it
Continue to pin the area making sure it will not more when you sew it
Sew over this area removing the pins as you go
Hand sew the two binding parts together on the front side. I then continue to hand sew the binding onto the back. Don't forget your label!!
Until the next stitch!
tongue
Sunday, March 31, 2013
Friday, March 15, 2013
Redneck Light box
I started working on a very intense appliqued quilt. I found myself taping the pattern to my kitchen window. I stood there and traced and traced and stretched my shoulders. After standing there for a couple hours, I thought there has to be an easier way!!! Light bulb lit!!!!
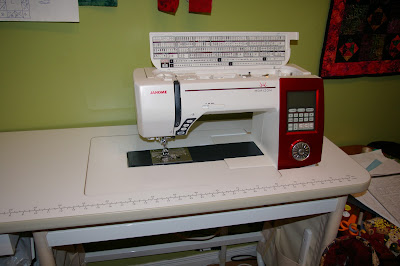
I contemplated ordering a light box. The next question was where am I going to store that when I am not using it? It was dark outside that night so I went to the sewing room and just sat there looking around. I bought a new sewing machine a while back, and it sits in a table. It also came with an extension table that I have never used. Hummmm So this is my redneck lighting box, available when needed, easily stored :P
I grabbed my extension table and set it on top of the hole. That gave me enough room that I could easily set a 8 x 10 sheet of paper in the glass area.
Until the next stitch!!
I contemplated ordering a light box. The next question was where am I going to store that when I am not using it? It was dark outside that night so I went to the sewing room and just sat there looking around. I bought a new sewing machine a while back, and it sits in a table. It also came with an extension table that I have never used. Hummmm So this is my redneck lighting box, available when needed, easily stored :P
Here is my sewing machine in it's table.
So I took my machine out of the table giving me this gaping hole.
I grabbed my extension table and set it on top of the hole. That gave me enough room that I could easily set a 8 x 10 sheet of paper in the glass area.
I then grabbed one of my OTT lights and set it under my table. It is plenty bright enough for me to see to trace
Here is a before picture:
Here is the after picture:
I got my son to come in and take some pictures for me. He can be quite the photographer at times. Here they are.
Monday, March 11, 2013
A whole lot of crazy - my next quilt project
I have been looking for a difficult applique project to trupunto. I found it. I am going to call it A whole lot of crazy. There are 20 blocks. I have the background blocks together and most of the applique traced. Here are some pictures.
I will be back later in the week to show you how I traced these out, redneck way!!
Until the next stitch!
I will be back later in the week to show you how I traced these out, redneck way!!
Until the next stitch!
Subscribe to:
Posts (Atom)