

I have been making excuse after excuse on why I was not practicing machine quilting. I don't have a table for my machine, I want a new machine. I then went to needing a stitch regulator, that will assure perfect stitches. Oh and I need a new desk, but not until I get my new machine. Excuse after excuse. Still no practicing. Then I was watching one of Leah's video and her young fella said "Stippling, nothing to be afraid of, now lets go quilt!" Out of the mouths of babes!! He is so cute!!
So first things first. I have been a great student of everything Leah says. I adjusted my free motion foot for my machine and I have had excellent luck with it. My husband bent the pin and cut out the bottom of my foot so I can see better. The elastic fills in the space so my foot is not too high or too low. It just makes sense. Here is her video.
So I need to get set up. Here it my set up.


I do not drop (or in my case cover) my feed dogs either. I used another technique that Leah teaches.
0 means they do not move my fabric backwards. They still go up and down but do not push at all. Her video on that is here.

Oh, I forgot to tell you why I am setting up!! I have the cutest little nephew, Oliver. He is going to be one year old next week. I decided to make him something quick, but cute.

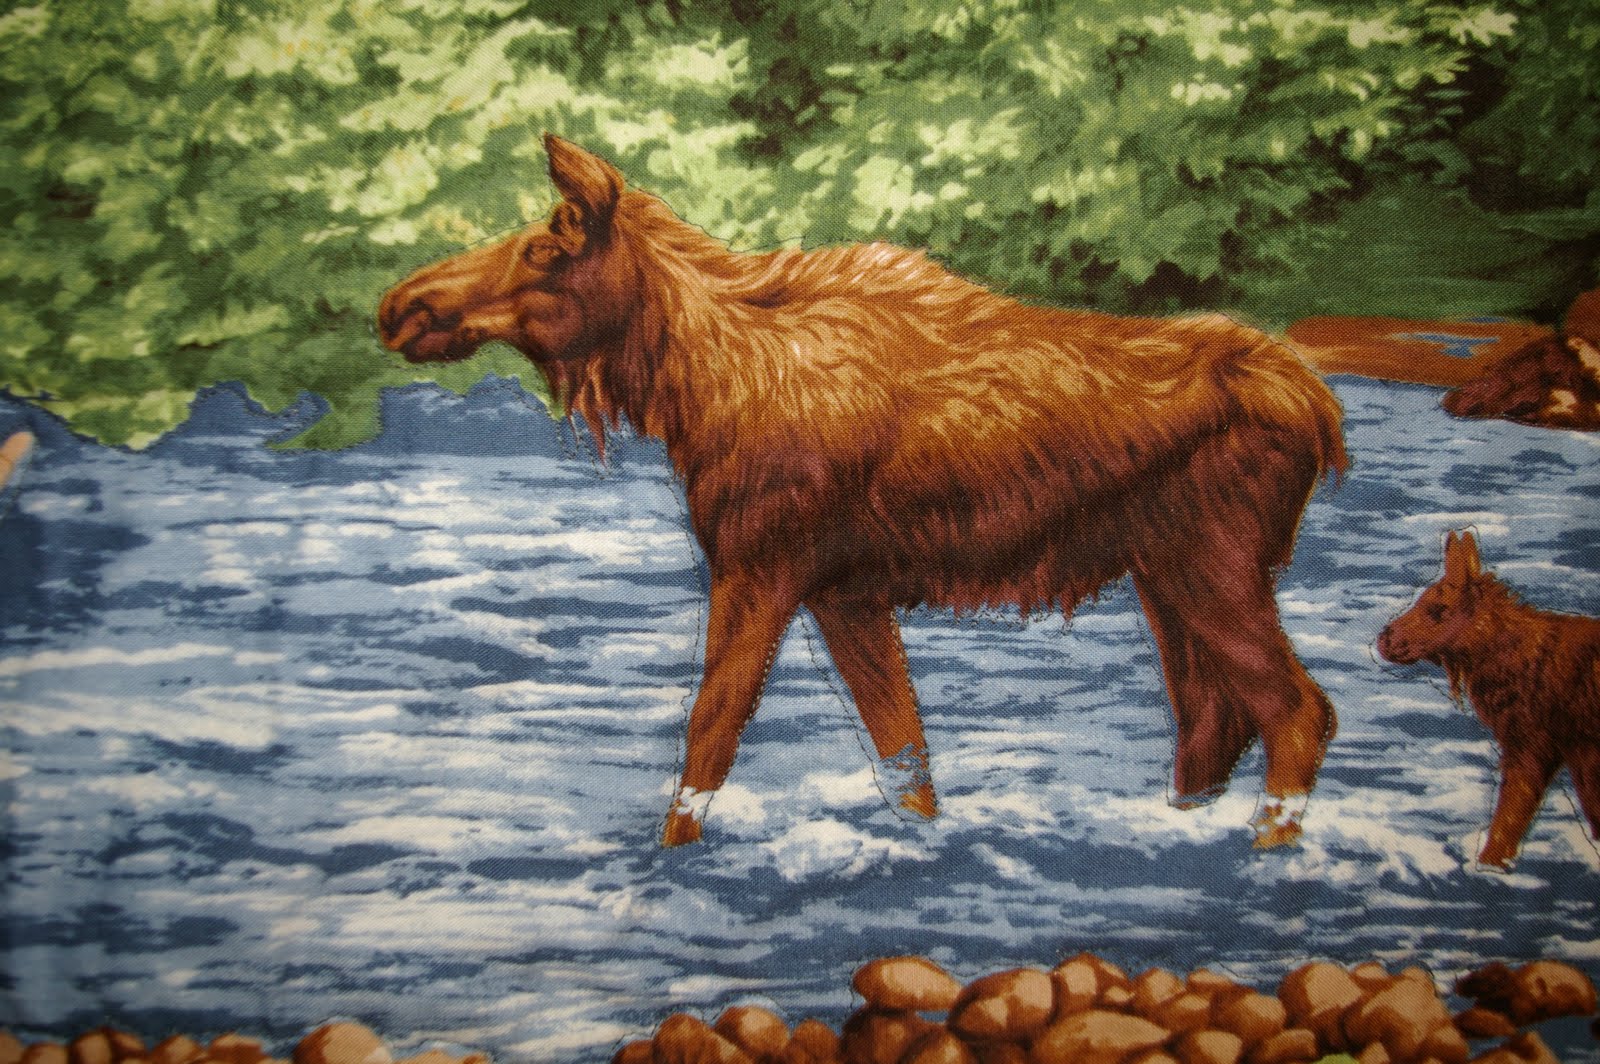
I was given this cute Moda panel for hosting the retreat a couple years ago. I decided it would be perfect. I cut it apart and added the inside just for contrast. If I would of thought of it I would not of done it, because it just made it wider than width of fabric!! His parents are into moose and as my blog title may suggest, so am I. I was really looking for something that I could really practice quilting with.

So I laid it on the kitchen floor and pinned it together. I bought a polyester batt by mistake but learned that night that Leah recommends them for machine quilting. I also used polly thread on the top because that was all I had green in. I did use Aufil on the bottom and my machine did not dislike it. So off I go. I started quilting around the animals, and the rocks and the treeline. My efforts was not the greatest. Here is my first moose.
When she was young she had a stick go into her leg, which gave her a sore knee!!


Her baby was quite choppy!! I figured out here that I do not quilt backwards well. Need to pay more attention to that.

And then suddenly I was rocking. This is fun. How about some grass, that would look different and I can practice my herky jerky stitches. They look pretty good!! On to the middle. That check should quilt well. WRONG!! I was fighting with the left hand side. Now I am thinking that a larger throat plate would be really fantastic. Maybe more important then a stitch regulator. I did so much better after I slowed down.

It was about now that I realized that something was not working. I seemed to have these big jumps when I raised my needle. I was trying to go quick and it was too late and the stitch was in. Why is that?? I actually stopped and thought it all over. I had tension on my needle, I needed to move the fabric more before I started. The fabric was shifting as soon as the needle was free. After I got that understood it never happened again. Another lesson learned. And what a bad place to stop, I know better, stop in the middle!!

But my stitches are not totally hideous!! They are getting a bit more consistent!!
I did not go over every line here. I looked it all over and decided that I could get away with this. I think I broke thread once to make it.

On to the trees. I decided to do them last so I could deal with any stretching I may have. I decided to thread paint the trees. I wanted to give it some details and texture in that area of the quilt. And it also gave me a great way of trying to travel on the line. I went over each line forward and backwards. What a great way to practice traveling. I know this is the key to successfully completing a lot of machine quilting patterns. I must admit that I was tickled with my success. Now I am getting consistent stitches and traveling and staying pretty close. If I go out of the line, in this quilt, who cares!!

When it came off the machine I was all smiles. I only have one pucker in the back of the quilt, not bad. And when I took pictures of it, it is still hard to see so I skipped it here. I did have an issue with extra fabric between the trees and the middle check part. There is nothing that looks bad, but if I had done more quilting in that area I would have.


So my mind wanders, why?? I look it all over and the light comes on. I did not stretch the backing out enough. It is flannel and I just taped it down. I really did not stretch it. Another lesson learned. I went to Leah's website and read how she stretches her's and run out and bought a whack of elastic for my next project.
On to the binding. I learned a new way of putting binding on. You do all of the sewing on the machine. I seen it at a quilt meeting in Keswick, but I still did not get it. Even better, we are doing a demo thru program at guild this year on how to do it. So I went to You Tube and typed in binding by machine and got the Missouri Star Quilt Co demo on how to do it. Here it is. The part that I had been missing was that you sew it onto the back and then pull it to the front. Very important for my visual. I recommend pressing it before attaching it to the front.

The front went well, but to my surprise the corners did not look good on the back. You follow the stitch line on the front and I was more worried about the miter then the sewing line. Another lesson learned. I am learning sooo much with this quilt.

I was really amazed at how much thread I used. I had never thought of it before. I ended up using 2 small Metler spools on the top alone. No big deal, but |I need to remember if I am ordering matching thread. Now I do tend to think ahead. I must mention that if you are going to use this binding method, remember to sew your label into the back as you apply the binding. I did remember.

And it is amazing how much I have learned from Leah Day. She is such a resource on the internet with endless education. Not only does she teach the stitch, she will help right from the beginning. Her videos on each stitch gives me the visual that I need to try it. Her calm voice entered my head over and over again when I was quilting. I am so excited that I have found her and I am excited to get to the first quilt along she has, stippling!! Thank you so much Leah!!
Until the next stitch!!
The places where you "free motioned" look great for a beginner! You're doing it! One note....anything that's a straight line, like in the checked squares, I use my walking foot to quilt that. Even I couldn't those lines straight with the stippling foot:)! I do all my straight line work first with the walking foot, then go in and do my free motion....just a thought :)
ReplyDeleteGreat job! I love the backing fabric with the moose outlines.
ReplyDeleteGo Janet! Practise practise practise! You;re right - little ones do not care about the quilting. :) He only knows it was made with love. ;)
ReplyDelete